After my various Pokemon hacks and reading portions of the Pokemon Red source code, it occured to me it would be fun to write my own game from scratch. But in typical fashion I got sidetracked thinking about the engine, levels, sounds and graphics.
I decided that “obviously” the best thing to do was to write editors for the game first, starting with the paint program.
I did most of this away from the internet, giving a more authentic feeling of having just the assembler between you and the machine and just the manual to guide you. (I did ocasioanlly visit #pret for advice)
I could not find much in terms of complete tutorials. I bascially relied on 4 major resources.
- pandoc lots of info about the hardware
- CPU manual all the details about the instruction set
- GALP sample code and hardware defines
- pokered large corpus of working code and tooling to steal and learn from
I figured I would dedicate one tile set entirely to the canvas and the other on to the UI. I’d use the background tiles for the canvas, the window tiles for the UI and the sprites for the cursor.
Until I found the window layer is opaque and shares the same tile set as the background. It even turns out the two tile sets partially overlap, giving me only half a tile set for the UI.
In the end I did not use the window layer, but switched the tile set used by the background during hblank, so that the top half of the background is drawn using the first tile set and the bottom with the other set. A few hundred lines of assembly later…
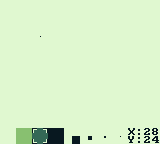
With the UI basically working I started actually drawing tiles. This involves finding the correct tile, the correct row in that tile, and then flipping two bits in the 2 bytes comprising that row. Dozens of lines of assembly later…
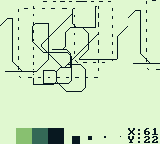
Drawing bigger lines is a matter of flipping more bits.
To do this I defined a pattern like %11110000 that I would roll to the correct position and and with the tile. This does kind of break when you draw a big brush past a tile edge, but that’s a problem for later.

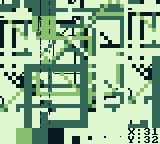
This is what I love about assembly game development. Instead of a nice error message you get this glorious glitch on your screen and you have no idea what you did wrong.
The Game Boy has this weird two bits per pixel format where all significant bit for a pixel are in byte one and the least significant bit for the pixel is in the second byte. The loop that was supposed to fill a square with the selected color wasn’t exactly right.
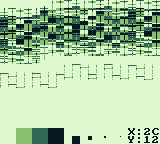
Fixing that loop allowed me to draw in various colors and sizes, but large brushes still overflow to an adjacent tile.
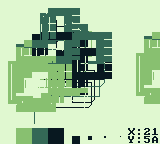
I chose to self-align brushes, so your 2x2 brush moves with 2px increments and the 8x8 brush moves at 8px increments.
Finally, I implemented loading and saving to SRAM. With the aid of the pokered tools, a simple make export converts your saved tile set to a png, and with a bit of fiddling you can also convert a random flower picture to a tile set and paint your name on it.

Whew, that was harder than expected. It was challenging and fun and I learned a lot, but I’m not sure if I’ll write a full game this way. The full 700+ lines of assembly can be found here.
It was shocking to me to find how limited Z80 assembly is. There are only a hand full of registers, and a hand full of valid combinations. Many operations (math, literal load, address load) only work with a as the source/destination. 16-bit addition (together with inc the only 16-bit ops) only works with hl and the stack pointer.
It’s easy to see that in this environment, hand-written assembly outperforms C. With so few ops and registers, C is bound to push a lot of local variables to the stack, and unlikely to make efficient use of high-ram and registers. It’s also very easy to do things in C that have no hardware equivalent, such as multiplication/division and anything with signed or 16-bit numbers.
On the other hand it’s also easy to see that on modern platforms and large code bases, C beats assembly in every possible way. Maybe even on a Game Boy an indie(you know, for individual) game is more feasible using C, when used carefully.
