Wishful Coding

Didn't you ever wish your
computer understood you?

Sparkfun 1.8v USB to serial

Sparkfun usb serial board with custom stripboard

I am trying to hack my Kindle 4 so that I can plug in a keyboard and use it as a Raspberry Pi with battery and E-paper screen.

To support a keyboard, the Kindle needs to use its USB port in host mode. This is called USB On The Go, and someone modified the Kindle kernel to support this.

So far, it does not work on my Kindle, but since the Kindle does not display any kernel messages while booting, I had no idea what went wrong.

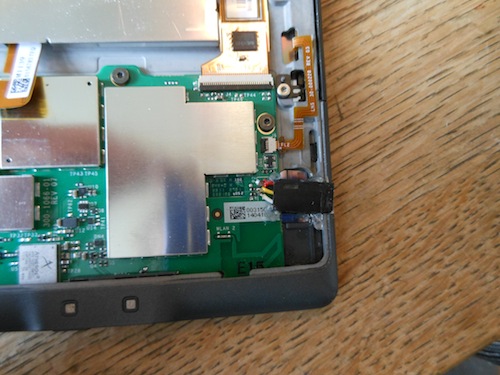
Thus, I had to open up the Kindle to attach a serial console. My brother is writing a guide about this at http://jurriaandevos.nl

kindle without back cover and with serial header

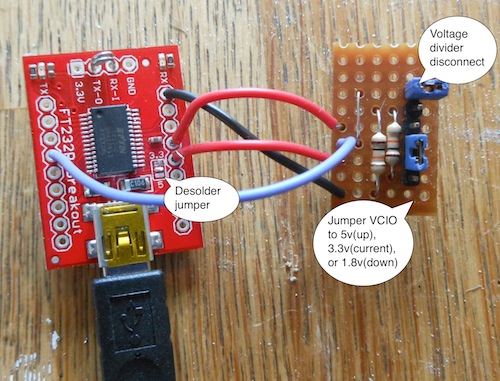
The next hurdle was that the Sparkfun USB-serial breakout comes with a solder jumper for 5v and 3.3v, but the Kindle uses 1.8v.

Therefore, I devised this small stripboard that lets you select any of these three voltages with 2 jumpers.

With the top jumper removed, you can switch the lower jumper to either jumper Vcc or the 3.3v reference to the VCIO pin.

With the top jumper connected and the bottom one in the lowest position, you engage a voltage divider between 3.3v and gnd, resulting in half that voltage(1.65v) on VCIO.

Before this works, you should desolder the built-in jumper, and remove the LEDs.

The LEDs are powered from Vcc, so they leak current into the circuit. I measured 2.7v on VCIO with the LEDs still on.

The voltage divider was made using two 10k resistors, but anything between 1k and 10k should be fine, I’ve read.

I’m looking forward to blog about my Kindle 4 keyboard soon.

Kindle 4 as a paper terminal

After reading about the Kindleberry Pi, I really wanted to experiment with e-paper as a computer monitor.

Sadly, I own a Kindle 4, which has no keyboard and consequently a lot less hacks. Still, I’m typing this post from my Kindle, so I will document how I got here.

Initially, I could not find a jailbreak for the Kindle 4, but at some point, I found this wiki page that documents everything you need to get started.

I used the universal method, which involves downloading data.tar.gz, entering and leaving diagnostic mode and rebooting a few times.

The jailbreak only installs a developer key, that allows you to install software. The piece of software we need is usbnetwork, which allows you to SSH over USB.

Download usbnetwork from here and follow the instructions.

Before you enable usbnetwork by renaming the auto file, go into /usbnet/etc/config and set USE_VOLUMD="true"

If all went well, the next time you connect your Kindle, it will present a network instead of mass storage.

You should now be able to ssh root@192.168.2.2. Linux users should run sudo ifconfig usb0 192.168.2.1 netmask 255.255.255.0 first, to bring up the network.

The terminal emulator used in the Kindleberry hack does not work on the Kindle 4. It expects a keyboard, I’ve been told.

However, vdp wrote a Java kindlet terminal emulator called KindleTERM that seems to run on Kindle 4.

KindleTERM was writen 2 years ago, and while it pretty much worked out of the box, it did not make an SSH connection to my PC.

I finally got something working using the remote keyboard feature, sshing to localhost and using dbclient to ssh into my Mac and start a tmux session.

Hawhill made a new version that just telnets to localhost, but he removed the remote keyboard. That’s useless.

Then hippy dave came around and added back the remote keyboard. Yay!

Then I came around and added a config file to specify which host/port/username/password/command to use.

Long story short, follow his instructions, but upload my version of KindleTerm to your Kindle. You should be using SCP or SFTP, since you can no longer use mass storage.

By default, my version still telnets to localhost, but it tries to read from /developer/KindleTermPV/work/kindleterm.properties. Mine looks like this:

host=192.168.2.1
login=pepijn
password=secret
cmd=tmux -S /tmp/kindle

After rebooting, you should see KindleTermPV on your home screen. When you start it, it should telnet to your PC.

If you see a blank screen, press back+keyboard or relaunch the app a few times.

If you are on Mac, you can run telnetd with sudo launchctl load -w /System/Library/LaunchDaemons/telnet.plist

You might want to export PS1=">" to save some precious screen space.

You should also export TERM=ansi if you experience any formatting problems. The VT320 implementation is a bit buggy.

kindleterm screenshot

RCX Plotter with Glidewheel

I modified the UBS plotter model to work with the NXT using 2 glidewheels and a normal converter between NXT and classic LEGO connectors.

The original model has two spoke wheels with touch sensors on them, to count the rotations. I replaced these with glidewheels.

Since the UBS is modular, it should be fairly simple to power other models with the same glidewheel-enhanced modules.

I also slightly modified the compressor gear train and paper feed to be more reliable with my old LEGO. Other than that, the model is completely original.

For a nice introduction to the original model, I refer you to Henrik Bækdahl.